LED Strip
17 April 2019
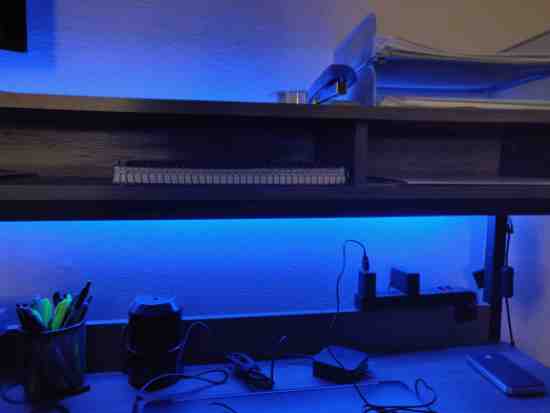
I wanted to have some colorful lighting in my room, so I decided to get some LEDs. I decided to go with a cheap DIY solution since that would let me control the color, brightness, etc. Luckily, Adafruit has their DotStar series of LED strips, making this project much more manageable. In addition to the DotStar LED strip, I used the following components:
Teensy 3.2 µController
5V, 4A power supply
Logic level shifter
Switch for the power supply
The Teensy board outputs 3.3V, but the LED strip needs a 5V signal. This is why I needed a logic level shifter. If you use an actual Arduino board or anything that outputs 5V, you don't need the shifter. The power supply is the barrel plug type, like many 9V power supplies. The switch isn't specifically for 5V, but it doesn't go up in smoke when it turns on, so it works.
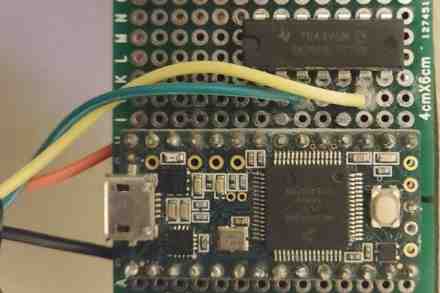
I also used some perfboard and wire to connect everything together. The grounds of every component are connected and power is connected to the Teensy board, LED strip, and logic level converter. The data pin and clock pin from the Teensy are connected to the 3.3V side of the shifter, and the corresponding output is connected to the LED Strip inputs.
The DotStar strip works like a giant register that stores the color for each LED. To set the entire LED strip to a color, the program must loop through every LED. The library for DotStar also requires the program to call the show() function before the LEDs actually light up.
for (int i = 0; i < NUMPIXELS - 1; i++) {
   strip.setPixelColor(i, color);
}
strip.show();
The "color" variable is a hexadecimal value representing the color. DotStar does not always follow the standard RGB scheme, so you will have to experiment. Mine is BGR, so #FF0000 is pure blue.
Here is my complete program:
#include <Adafruit_DotStar.h>
#include <SPI.h>

#define NUMPIXELS 60
#define DATAPIN 19
#define CLOCKPIN 16

//color constants
//DotStar likes blue-green-red because why not
#define GREEN   0x00FF00
#define PURPLE  0xFF00FF
#define YELLOW	0x00FFFF
#define BLUE    0xFF0000

uint32_t color = BLUE;

Adafruit_DotStar strip = Adafruit_DotStar(NUMPIXELS, DATAPIN, CLOCKPIN, DOTSTAR_RGB);

void setup() {
strip.begin();

for (int i = 0; i < NUMPIXELS; i++) {
	strip.setPixelColor(i, color);
}

strip.show();
}

void loop() {
}
First, the DotStar and SPI libraries are imported. Next, some constants are defined. NUMPIXELS is the number of LEDs in the strip. DATAPIN and CLOCKPIN are the pins for data and clock; these can be pretty much whatever you want. DOTSTAR_RGB is from the DotStar library from Adafruit.
Some constants are defined for colors, just for convenience. The "color" variable is used to easily define the color of the LEDs. You could also just use the constants as an argument to the setPixelColor() function, but I prefer the convenience of having it at the top of the program.
Next, an object called "strip" is created that represents the LED strip. The DOTSTAR_RGB argument comes from the DotStar library.
See Adafruit's website for more details on the DotStar library and usage.
In setup(), strip.begin() is called, followed by a for loop setting every LED to the chosen color. Since you can set each LED separately, it's easy to see how more complicated displays would be easy to make.
Finally, strip.show() is called to tell the LED strip to actually update. If you simply set the color, the LED will not update until the next time show() is called.
This is very simple and doesn't allow for much control, but I don't need it to do anything else anyways. In the future, I can change the code to get different effects.